How to register sales and purchases?
There 2 methods for registering sales and purchases in the 'Stock and Inventory' application: Simplified and Advanced. Check both methods to see which one is more suitable for your needs.
Method 1 - Simplified technique
Open the 'Goods' screen and tap on any item.
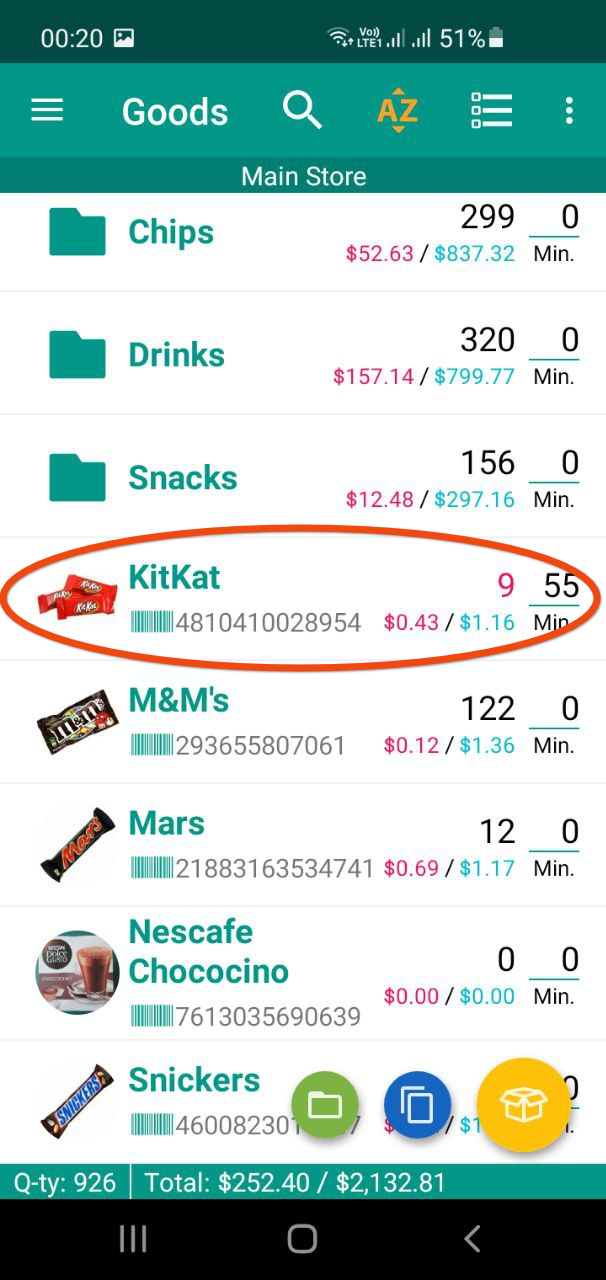
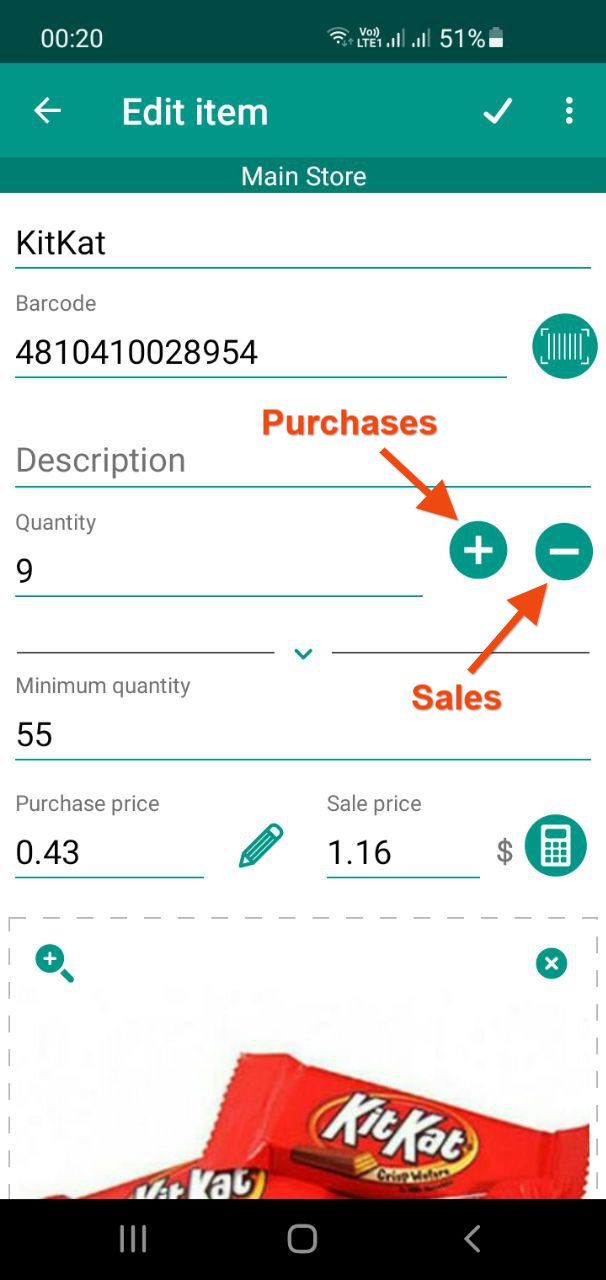
Tap on the 'minus' button next to the 'Quantity' field. (For purchases press the 'plus' button instead.
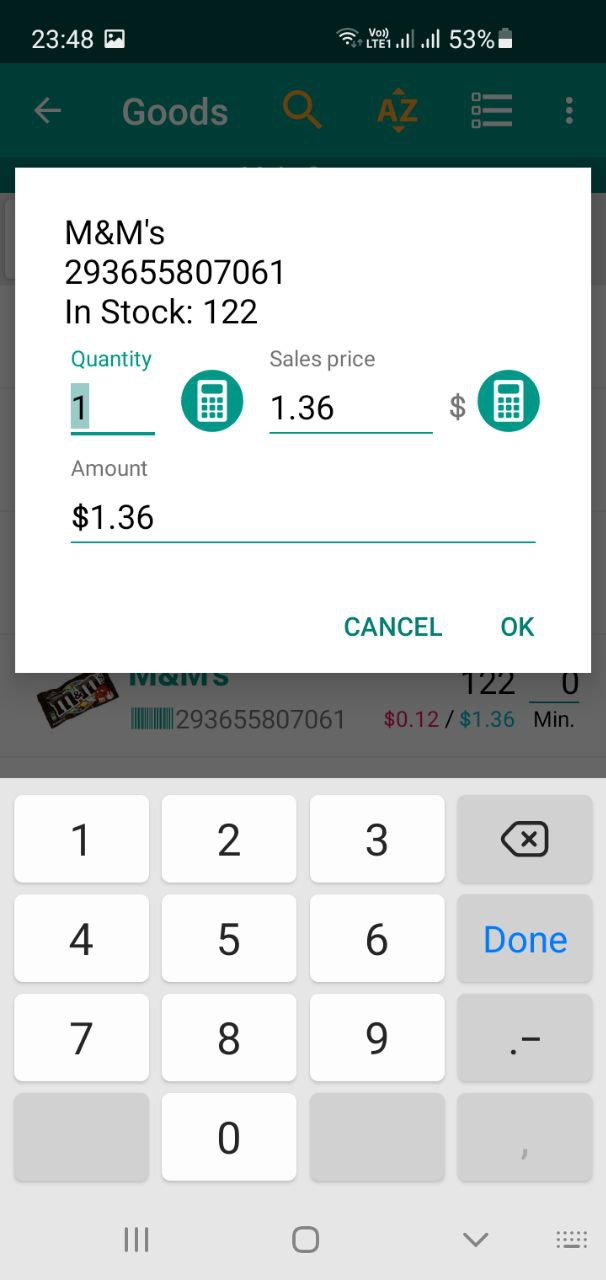
You will see the dialog window. Input the quantity and price in if needed.
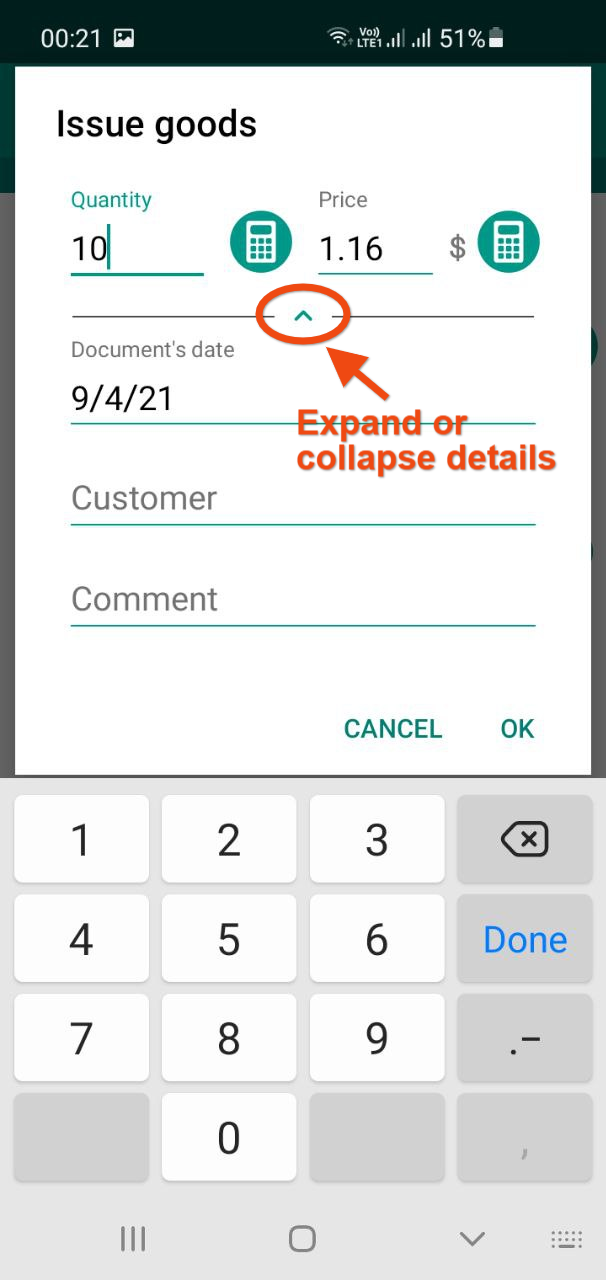
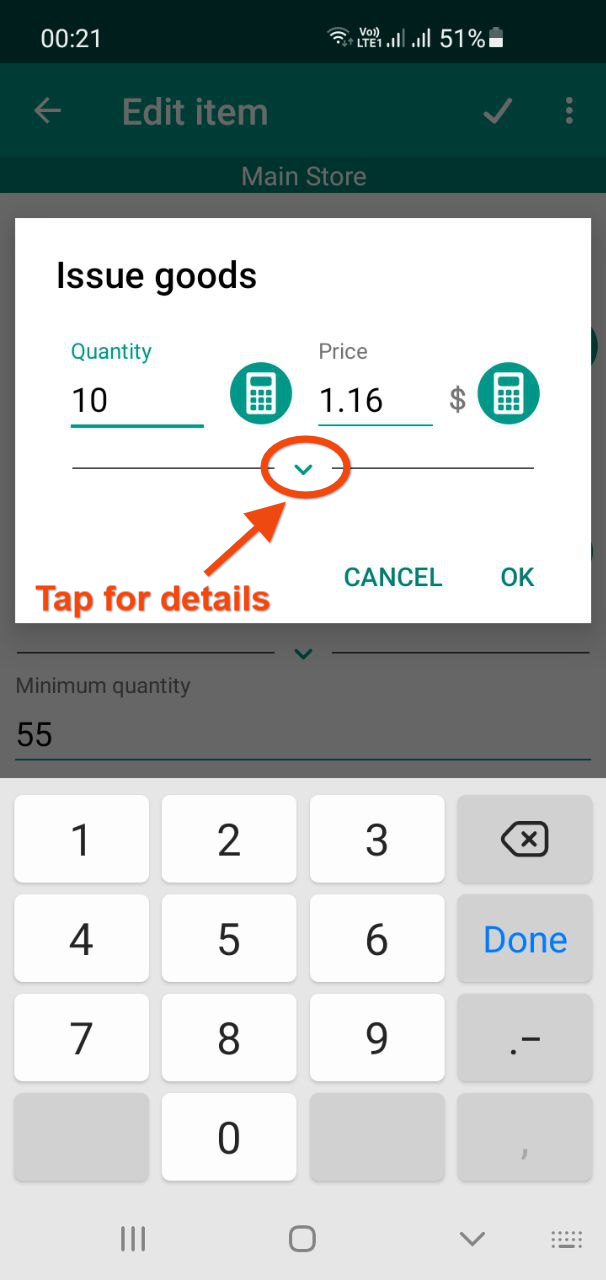 You can also expand the panel to input other details such as date of sale, customer and comment.
Press OK to finish.
You can view and edit all the past transactions in the 'Documents' section.
You can view and edit all the past transactions in the 'Documents' section.
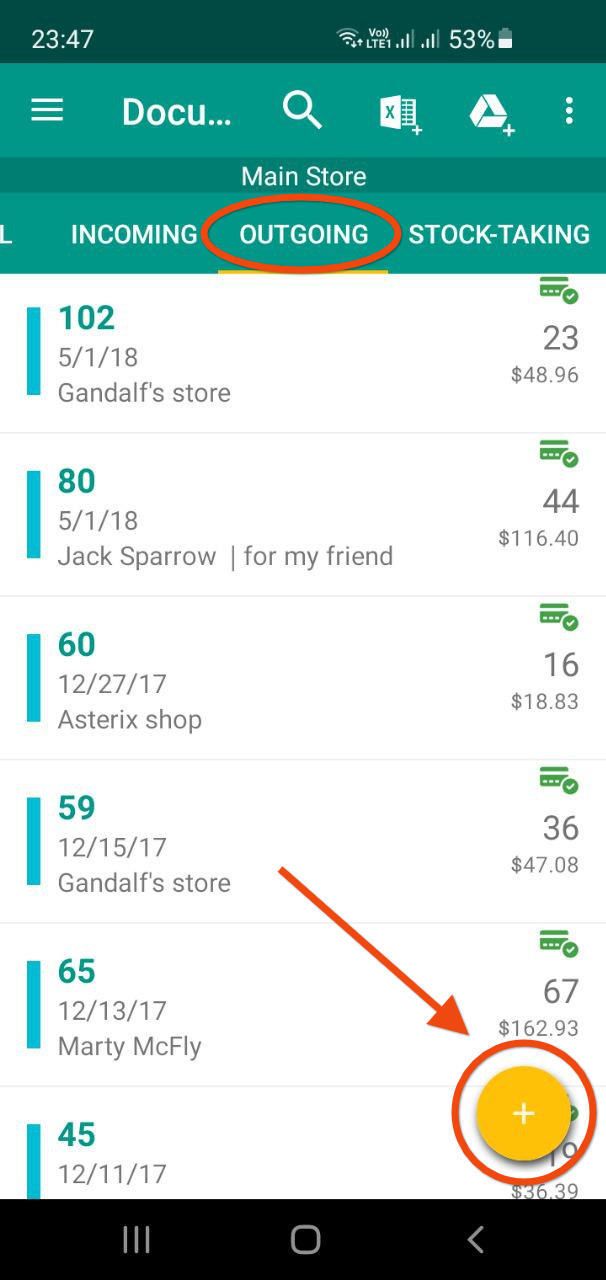
Method 2 - Advanced technique
To register a sale go to the 'Documents' section and press the big yellow '+' (plus) button to create an Outgoing document
A new document has been created.
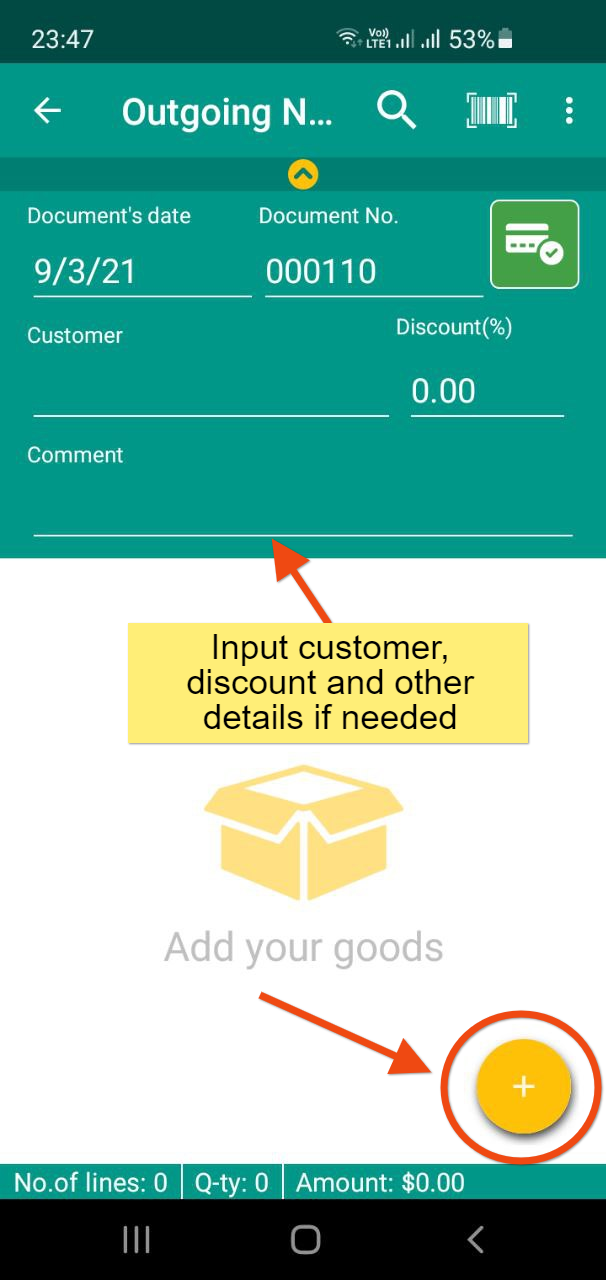
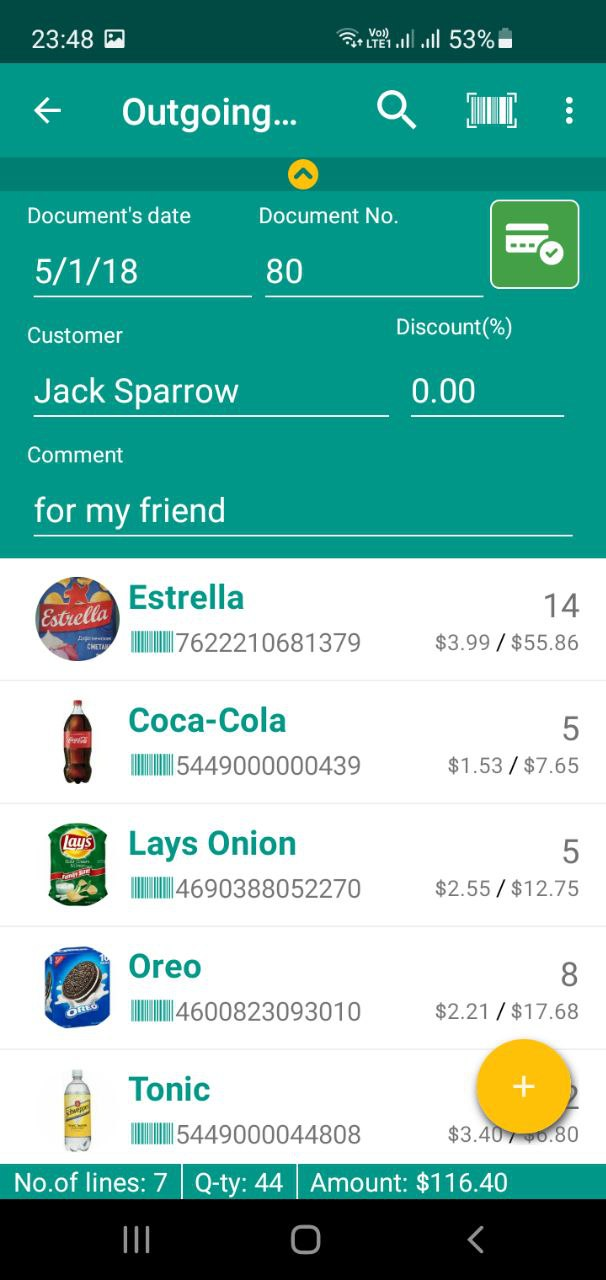
In the new document's screen you can swipe the header down to input customer name, discount and other details (you can skip this step if you do not need it)
In the new document's screen you can swipe the header down to input customer name, discount and other details (you can skip this step if you do not need it)
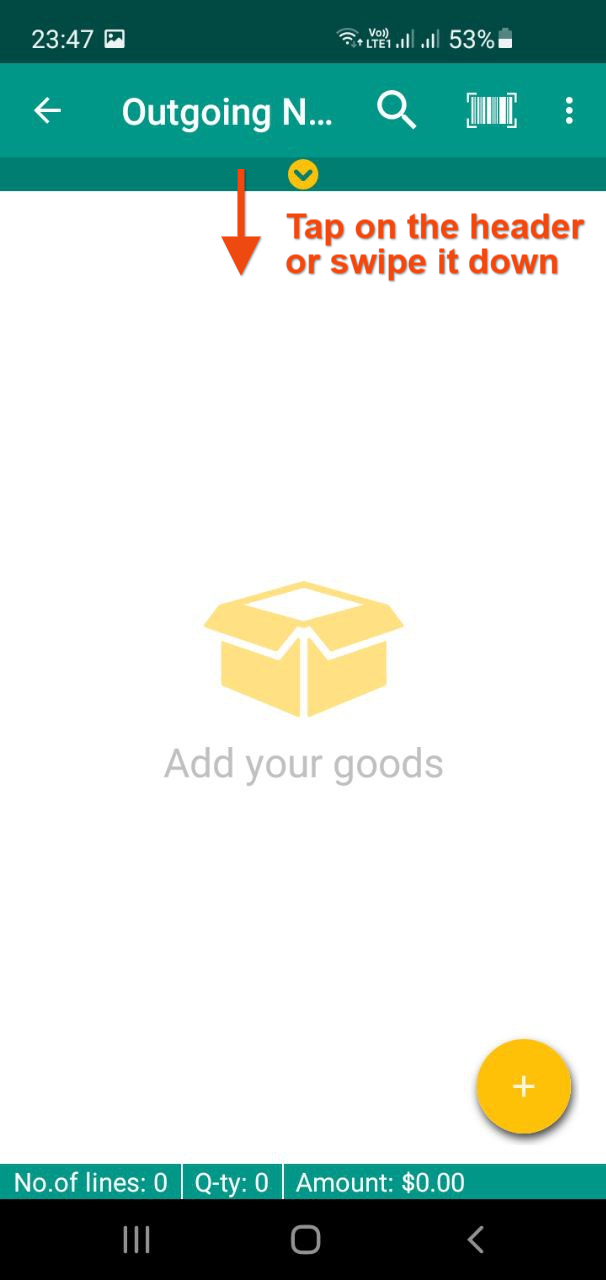
Press big yellow '+' (plus) button to add items you wish to sell.
Now you will see your list of goods in stock. Tap on any item to add it to the document.
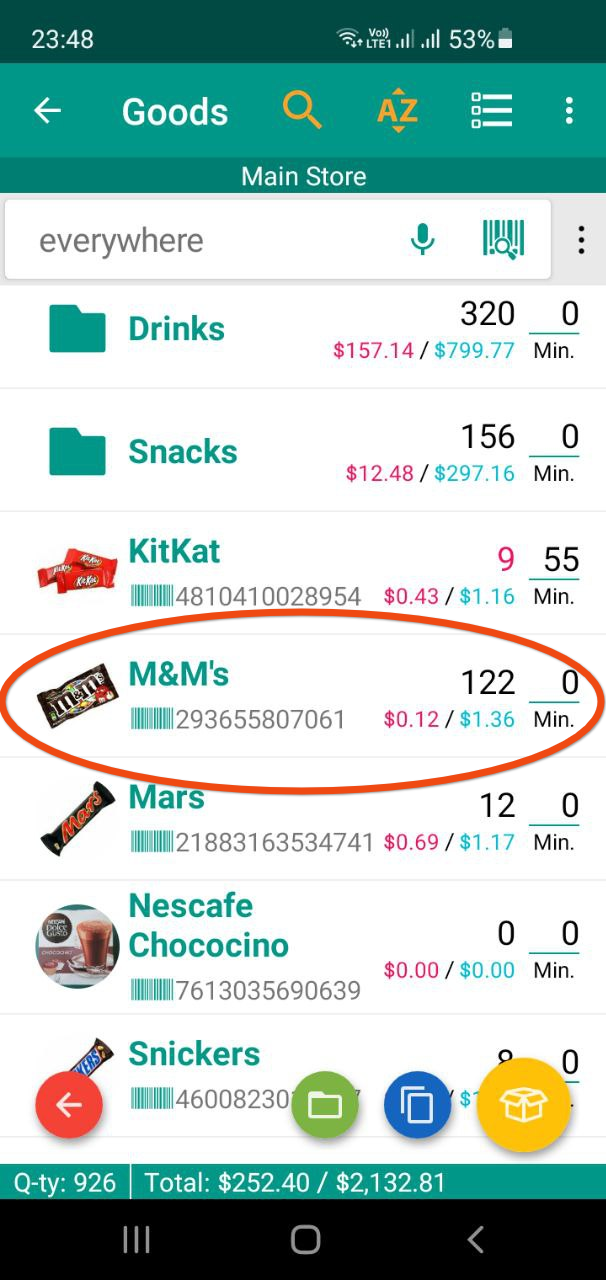
Input the quantity. You can also change the sale price manually if needed. Press Ok.
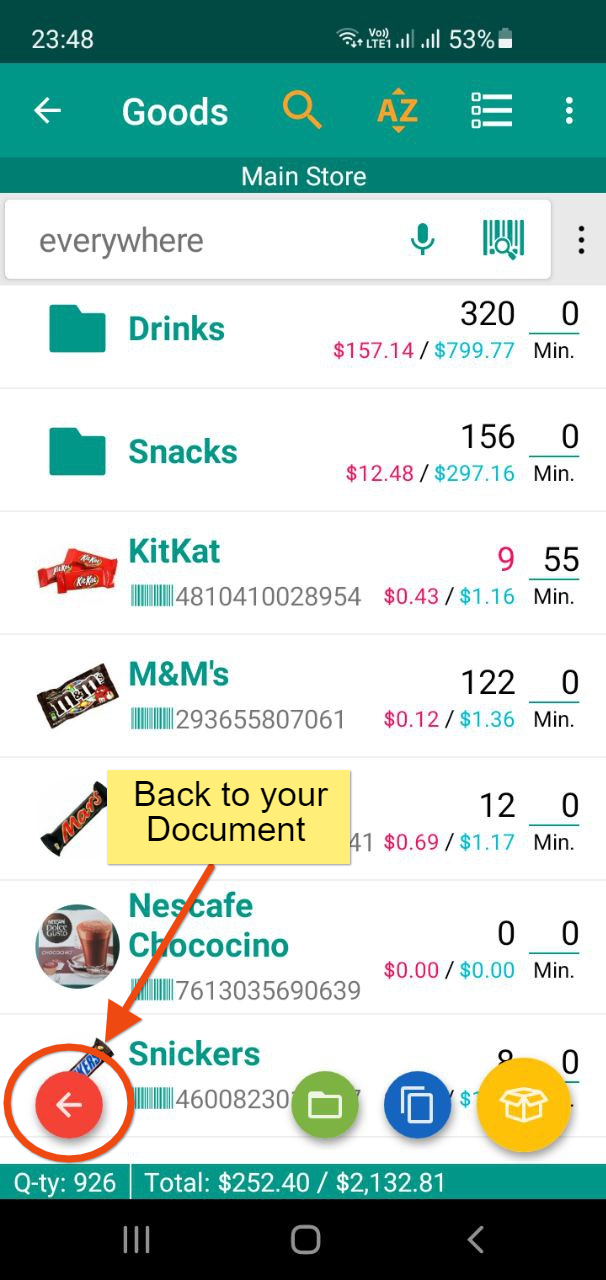
 Continue adding items and press the red arrow 'Back' button when you are finished.
 Now you can see your Outgoing document with all your items added.
Purchases work in a similar way but you should use Incoming documents instead.